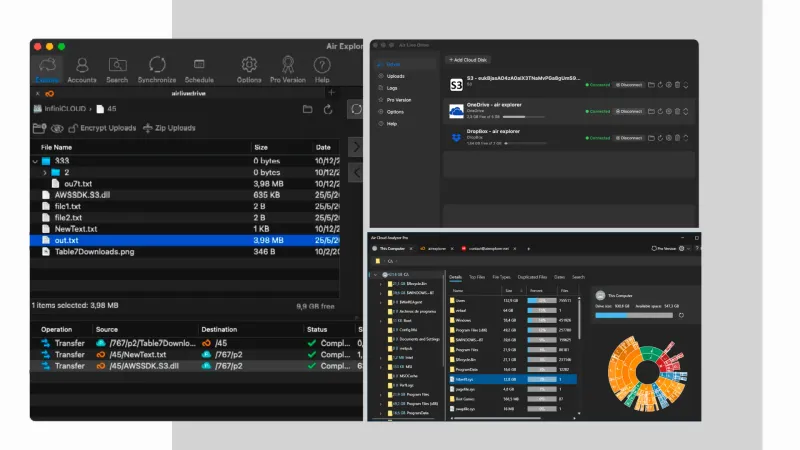
Managing cloud storage on a Mac becomes more complicated when your files are spread across several accounts. Work documents might be in OneDrive, shared projects in Google Drive, and personal files in Dropbox. Moving between browser tabs makes everyday tasks harder to follow.
Air Explorer, Air Live Drive and Air Cloud Analyzer are all available for Mac. Each application handles a different part of your cloud workflow: managing files, accessing them through Finder, or understanding what is taking up storage space.
This guide explains how to get started with these cloud storage tools for Mac and combine them in your daily routine.
Three Cloud Storage Tools Available for Mac
Before installing, choose the application that matches your task:
- Air Explorer for Mac: organize, upload, download, transfer and synchronize cloud files.
- Air Live Drive for Mac: connect cloud accounts so you can access their files through Finder.
- Air Cloud Analyzer for Mac: analyze cloud and local storage to identify large files, review possible duplicates and explore space usage.
You can start with one application and add the others as your needs grow. Their official websites provide Mac downloads: Air Explorer, Air Live Drive and Air Cloud Analyzer.
How to Use Air Explorer on Mac
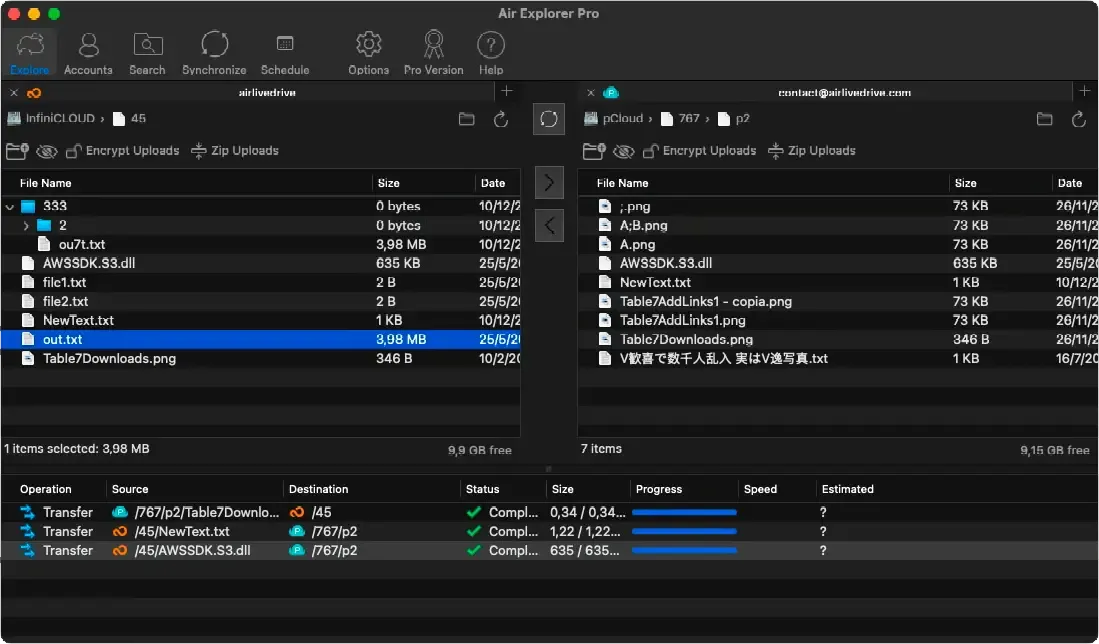
Air Explorer brings your cloud accounts into one file management interface. It is useful when you need to organize folders, upload files from your Mac or transfer documents between cloud services. Supported services include Google Drive, OneDrive and Dropbox. Explore Air Explorer.
1. Install and connect your accounts
Download the Mac version, complete the installation and open Air Explorer. Add a cloud account by selecting your provider and completing its authentication process. Repeat this for the other accounts you want to manage.
2. Organize and transfer files
Use the panels to open your source and destination folders side by side. For example, display a local project folder on one side and its cloud destination on the other.
Select the files you need and copy them to the destination. You can also create folders, rename items and organize existing cloud content.
3. Synchronize folders
Select the two folders you want to synchronize, then choose the synchronization mode that fits your goal. Compare the folders and review the proposed changes before running the operation.
For a first synchronization, try a small project folder. This makes it easier to check the result before working with a larger collection. See the Air Explorer user guide for detailed instructions.
How to Use Air Live Drive on Mac
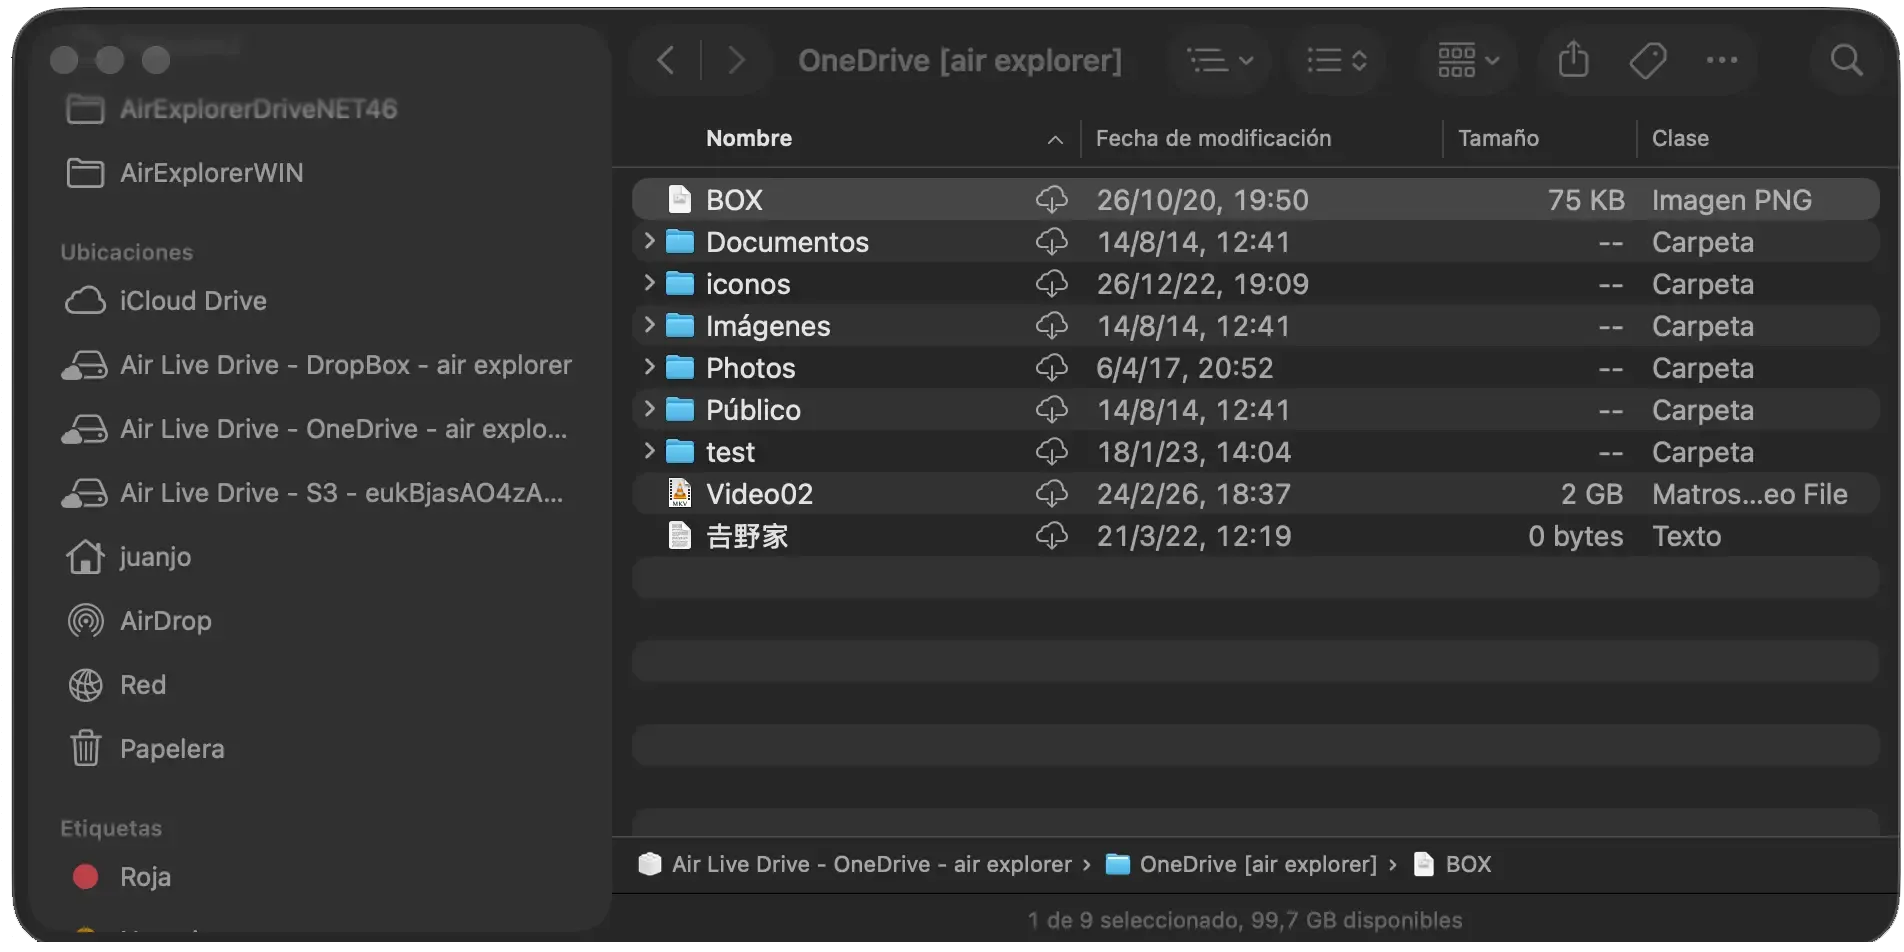
Air Live Drive makes cloud storage accessible through Finder. Instead of opening a provider’s website whenever you need a file, you can browse a connected account from the familiar macOS file manager. Learn about Air Live Drive.
1. Install the Mac version
Download and open Air Live Drive. The official Mac setup instructions specify macOS 13 or later.
If macOS blocks the File Provider extension, enable Air Live Drive in System Settings under Login Items & Extensions and File Providers.
2. Add and connect a cloud account
Choose Add cloud disk, select your provider and complete the sign-in process. Confirm the settings, connect the account and open it in Finder.
3. Work with your cloud files
Browse folders and open files with compatible Mac applications. You can then edit and save them through your connected cloud storage.
Air Live Drive does not require a full local copy of your entire cloud account. On macOS, Finder manages local downloads as files are needed. Wait for pending uploads to finish before disconnecting an account or shutting down your Mac. Follow the Air Live Drive Mac setup guide for further details.
How to Use Air Cloud Analyzer on Mac
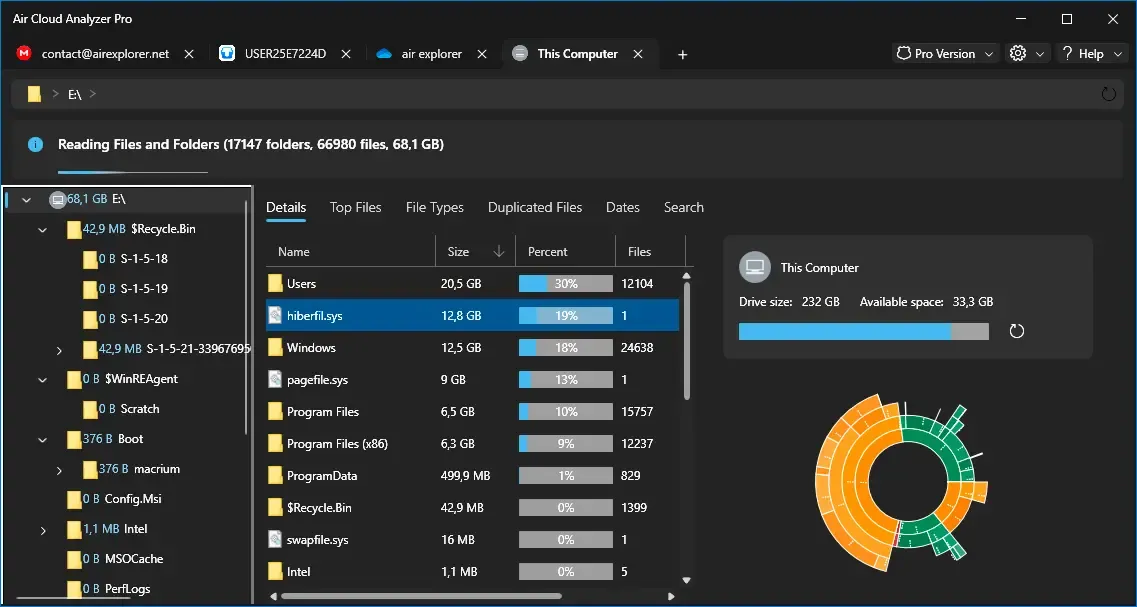
Air Cloud Analyzer helps you understand storage usage before deciding what to keep, move or remove. Its Mac application can analyze cloud accounts and local drives, while visual charts help reveal folders consuming the most space. Cloud analysis reads file metadata without downloading the actual file contents. Discover Air Cloud Analyzer.
1. Choose what to analyze
Install the Mac version and add a supported cloud account. Select the entire account or choose a specific folder. You can also select a local drive.
2. Explore the results
Review Largest Files, File Types and Dates to identify bulky files and older material. Check Duplicated Files for possible duplicates, reviewing their contents before removing anything: some providers only allow matching by name and size. The help center explains each view.
3. Plan your cleanup
Use the results to decide which files to archive or delete. The free version is read-only; deleting files and folders within the application requires Air Cloud Analyzer Pro.
Build Your Cloud Workflow on Mac
A practical routine is to analyze storage first, organize your files next, and access active projects through Finder.
Start with Air Cloud Analyzer to identify where space is going. Use Air Explorer to arrange folders and transfer files. Then connect your everyday accounts with Air Live Drive.
All three tools are available for Mac, giving you complementary ways to manage cloud storage directly from your macOS desktop.